
Split Level Stairs Upgrade
About This Project
Are the stairs in your split-level home looking worn or feeling slippery? This common challenge is the perfect opportunity for an easy DIY stair remodel. This guide will walk you through transforming your staircase with beautiful, non-slip carpet stair treads from Oak Valley Designs. We'll cover everything from choosing the right material to our simple installation process, helping you achieve a look that brings warmth and elegance to your home while making it safer for the whole family.
Tools & Materials

Oak Valley Tailored Square - Tread
Oak Valley Tailored Square - Tread
Treads
Steps

Choose Your Perfect Tread Material
30 minutesThis is where the fun begins! Let's find the perfect material for your home. Choose luxurious wool for its incredible softness and resilience, natural fibers for their rich texture and eco-friendly appeal, or durable synthetic blends designed for high-traffic areas and easy cleaning. Consider your daily life—do you have kids or pets? That's The Oak Valley Difference: offering quality materials that provide safety, style, and peace of mind.
Watch: Evaluate and Choose Flooring Style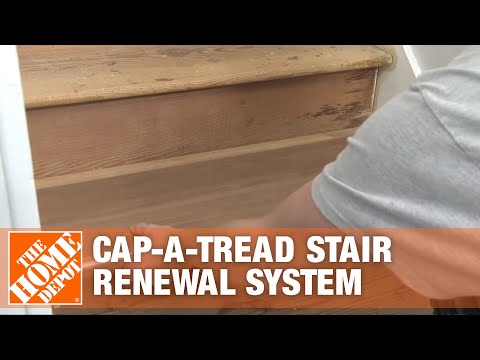
Measure for a Perfect Fit
60 minutesFor that seamless, custom-made to fit appearance, precision is key. Using a tape measure, find the width of your stair from side to side. Next, measure the depth from the very front edge back to the vertical riser. It's important to measure every single step, as variations are common in split-level homes. Write down these numbers so you're ready for a perfect order.
Watch: Measure Treads and Mark Laminate
Prepare Your Stairs for a Flawless Finish
120 minutesTo guarantee a secure bond that lasts, you'll need a clean canvas. If you have old carpet, now is the time to remove it, along with any padding, staples, or old adhesive residue. Give the wood a light sanding to smooth out any rough patches. Finally, wipe down each stair to ensure it is completely clean and dry. A pristine surface is the foundation for a successful installation.
Watch: Clean the Staircase
The Fun Part: Installing Your New Treads
180 minutesIt's time for our signature 'Clean, peel, and stick' method! This is the easy DIY stair remodel you've been waiting for—no nails, no glue, no stress. Simply remove the release liner from the adhesive backing on your new tread. Carefully align it with the front edge of your stair, making sure it's centered. Once you're happy with the position, press down firmly across the entire surface to activate the pressure-sensitive adhesive and ensure a secure fit.
Watch: Install First Stair TreadLet the Treads Settle In
1440 minutesYour patience in this step ensures a lasting installation and gives you peace of mind. To allow the adhesive to fully bond with the stair surface, it's best to limit foot traffic for a short period. While you can use the stairs gently, we recommend waiting 24 to 72 hours, depending on your home's temperature and humidity, before resuming heavy, everyday use. This gives the bond its maximum strength.
Watch: Install Subsequent Stair TreadsCaring for Your Beautiful New Treads
30 minutesNow that your project is complete, keeping it looking fresh is simple. Once the treads have fully settled, you can give them a quick vacuum to remove any installation dust. For ongoing care, regular vacuuming and spot-cleaning spills with a mild detergent and water are all you need. To protect the fibers and adhesive backing, we always recommend hand-washing and air-drying only; never put your treads in a washing machine. This gentle care ensures your stairs remain a safe and stylish feature in your home.